How Roofers Waterproof Step Flashing Along a Dormer Wall
In this article
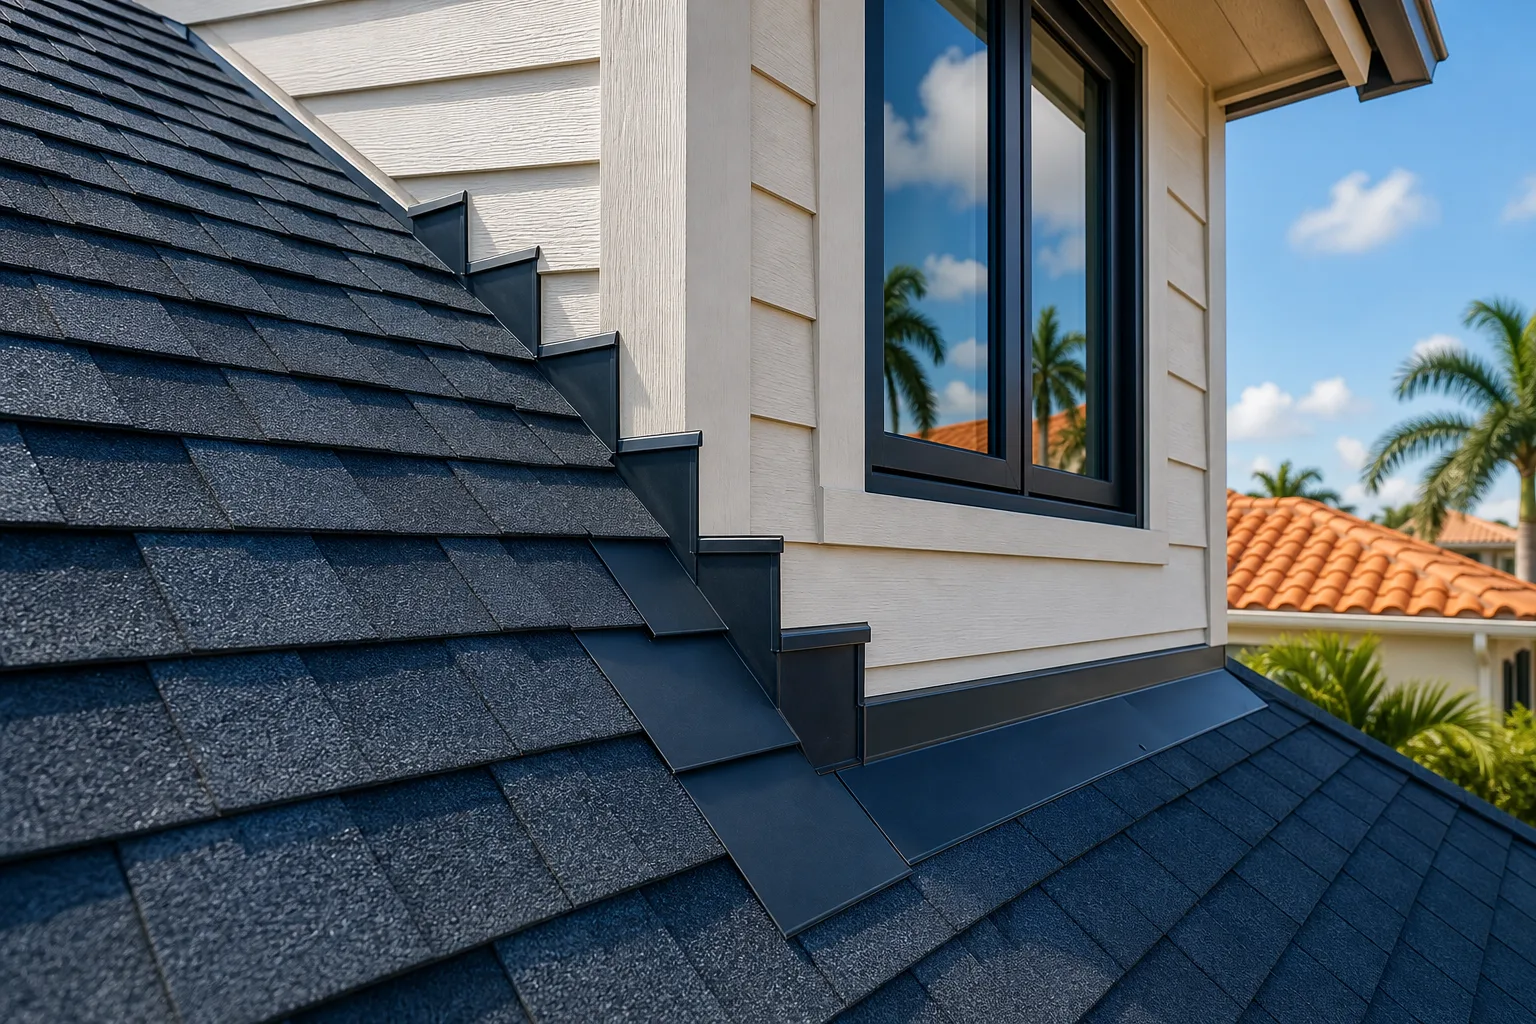
TL;DR: Step flashing waterproofs the joint where a dormer wall meets the sloped roof below it. Each piece of metal interlocks with a shingle course and overlaps the piece below it. The wall cladding or siding then covers the top edge. Skip any layer and you're setting up a leak.
What You Need
Before a crew touches the dormer wall, they need the right materials on hand. Using the wrong gauge metal or skipping the self-adhering underlayment is where corners get cut on cheap jobs.
- Step flashing pieces. Typically 26-gauge galvanized steel or aluminum, pre-bent to an L-shape. Each piece is roughly 4 inches on the roof deck and 4 inches up the wall. Some crews go wider on the wall leg in heavy-rain climates.
- Self-adhering membrane (peel-and-stick). Applied to the roof deck and up the wall sheathing before any metal goes on. This is the fail-safe layer.
- Roofing nails. Stainless or hot-dipped galvanized. Never use electro-galvanized on a metal-to-wood connection in Florida's humidity.
- Matching shingles, tile, or metal panels for whatever roof system is below the dormer.
- Counter flashing or finished siding to cap the wall leg of each step flashing piece.
- Roofing caulk or approved sealant. Used sparingly at termination points, not as a substitute for lapped metal.
Step 1: Strip Back and Inspect the Existing Substrate
If this is a repair or re-roof, the old flashing comes off first. I've seen original flashing from the 1980s that was just tar-pasted to bare wood with no membrane underneath. It held up until it didn't.
Once the old material is off, check the wall sheathing and roof deck for rot. A dormer corner concentrates water right there, and if the sheathing has gone soft, no amount of new flashing will fix a rotted substrate. Replace it now.
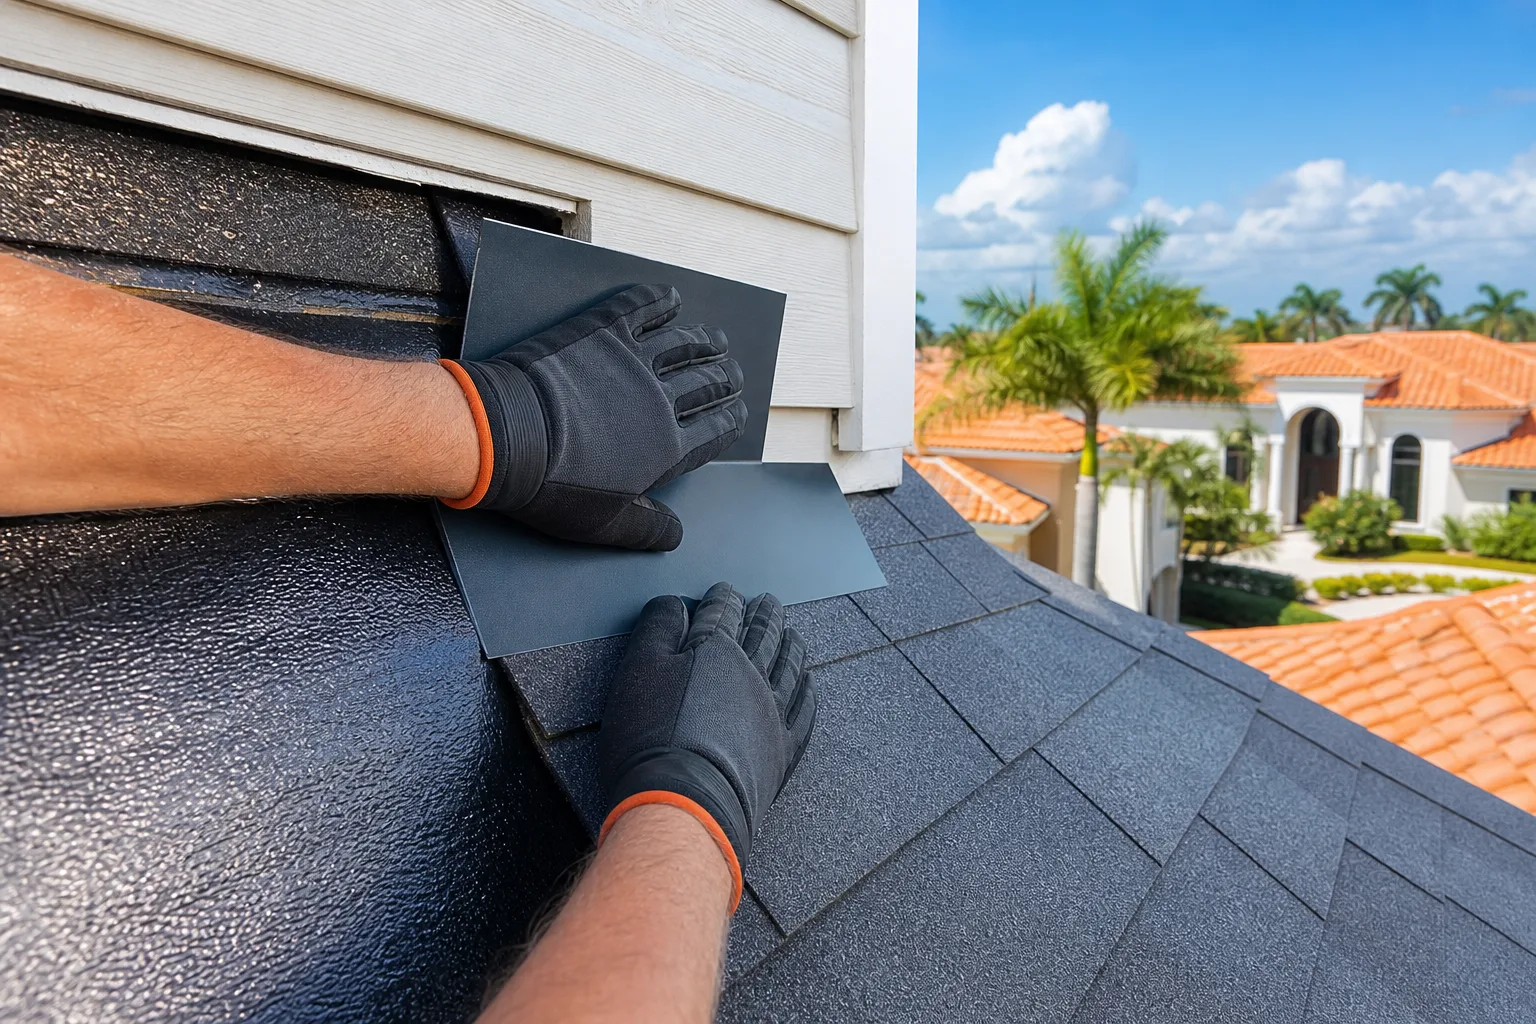
Step 2: Run the Peel-and-Stick Membrane First
This step separates a proper installation from a shortcut.
Apply self-adhering underlayment to the roof deck starting at the eave, lapping up the dormer wall sheathing by at least 4 inches (some Florida installers go 6 inches given our rain intensity). The membrane should be installed in the same direction as shingles: low to high, so each upper layer laps over the one below it.
At the corner where the dormer wall meets the main roof slope, the membrane needs to be cut and folded carefully so there are no gaps or fishmouths. Any wrinkle that creates a channel will hold water against the wall.
Step 3: Install the First Course of Shingles or Panels
Set the first row of roofing material at the base of the dormer wall before you touch any step flashing. The flashing process works from the bottom up, interleaving metal with roofing. If you try to retrofit flashing after the shingles are down, you're doing it wrong.
For a tile roof, the base course and mortar bed have to be thought through before the first step flashing goes in. For metal roofing, the panel seam locations relative to the flashing pieces need to be planned up front.
Step 4: Set the First Step Flashing Piece
Place the first L-shaped piece of step flashing at the bottom corner of the dormer wall, sitting on top of the first roofing course. The horizontal leg rests flat on the deck, the vertical leg goes up the wall.
Nail the vertical leg to the wall sheathing only. Do not nail through the horizontal leg into the deck. That nail hole in the deck leg is a water entry point. The deck leg stays loose so it can drain and so the two surfaces can move independently as the structure expands and contracts.
The horizontal leg slides under the next shingle course. The shingle nails hold the shingle, not the flashing.
Spotted a leak or missing tiles? Schedule a repair visit
Step 5: Interleave Each Subsequent Course
This is the step-flashing rhythm: shingle course, then flashing piece, then shingle course, then flashing piece, all the way up the dormer wall.
Each new step flashing piece overlaps the one below it by at least 2 inches. The overlap keeps water from wicking backward under the joint. In South Florida where a storm can push 6 to 8 inches of rain per hour sideways, that overlap is not optional.
Keep the top edge of each flashing piece hidden under the shingle above it. If you can see exposed metal from the ground on the roof field (not at the ridge cap), something wasn't lapped correctly.
Step 6: Handle the Top Termination at the Dormer Corner
Where the dormer wall meets the ridge or upper roof slope, the step flashing sequence ends and you need a saddle or head flashing to close the top. This piece kicks water away from the top corner and directs it onto the step flashing below.
This is a custom-bent piece. It's not a standard product you grab off a shelf. A crew that skips the top termination and just runs sealant up there will have a callback within a few years.
Step 7: Apply Counter Flashing or Re-install the Wall Covering
The vertical legs of the step flashing should not be exposed. They get covered by counter flashing, stucco, lap siding, or whatever the wall cladding material is.
Counter flashing is regletted (cut into) the mortar joint or wall surface and folded down over the top of the step flashing vertical legs. It should not be caulked to the step flashing. The two pieces need to remain independent so they can expand at different rates. Sealant between them traps water once it cracks.
If the wall cladding is stucco (common in South Florida), the stucco terminates above the step flashing with a metal stop bead. It does not get troweled down onto the flashing metal.
Common Mistakes
Nailing through the deck leg. I've pulled off failed flashing jobs where someone nailed every piece flat to the deck, creating a row of nail holes in the worst possible location.
Relying on caulk instead of lapped metal. Caulk is a secondary seal, not a primary water barrier. It cracks, dries out, and fails. Metal lapped in the right direction is what sheds water.
Not using a peel-and-stick membrane under the flashing. Florida is not a forgiving climate for shortcuts. The membrane is your backup if water gets past the metal.
Skipping the top termination piece. Water will find the open top corner every time.
Using mismatched metals. Aluminum flashing against copper nails, or galvanized flashing against aluminum, creates galvanic corrosion. The metals need to be compatible.
Storm-chaser crews cutting corners. After a hurricane or tropical storm, itinerant crews show up offering fast, cheap repairs. Step flashing done by someone who doesn't know the system is worse than no flashing because it hides the problem until the deck is rotted. If you need roof repairs after a storm, check the Hurricane Storm Center for guidance on vetting contractors.
Bottom Line
Step flashing a dormer wall is a layered, sequenced system. Every piece of metal, every course of roofing, and the membrane underneath have to work together in the right order. There's no single magic product that makes it waterproof. It's the method.
If your dormer is leaking, it's almost always the flashing, and it's usually either missing or installed without the proper overlap and termination. A visual check from the ground won't tell you which. Someone needs to get on the roof and trace it.
If you're in Boynton Beach, Delray Beach, Boca Raton, West Palm Beach, or the surrounding South Florida area and you're seeing ceiling stains near a dormer, request a quote or use the instant estimate tool to get a licensed set of eyes on it. We've been doing this since 2005 and we don't cut corners on flashing.
Spotted a leak or missing tiles?
Small problems get expensive fast in the Florida sun. Get it looked at by a local crew before the next storm.
Frequently asked questions
How long should step flashing last on a dormer?
Properly installed galvanized or aluminum step flashing typically lasts 20 to 30 years or more, often outlasting the shingles above it. The usual failure points are the sealant at the terminations drying out, or the wall cladding allowing moisture to sit against the metal. Inspect the flashing whenever you replace or repair the roofing above it.
Can I seal a leaking dormer with caulk from the outside?
Caulk can slow a small leak temporarily, but it won't fix a flashing problem. Once the sealant cracks or separates, the water entry continues and the underlying wood may already be damaged. The only real fix is to re-install or replace the step flashing with the correct layered system.
Does step flashing apply the same way to tile and shingle roofs?
The principle is the same but the execution differs. On a tile roof, the flashing pieces have to account for the thickness and profile of the tile, and the mortar bed at the dormer base needs special attention. On a shingle roof, the flashing integrates more simply with each course. Both require a peel-and-stick membrane underneath.
What is the difference between step flashing and counter flashing?
Step flashing is the L-shaped metal that interleaves with each roofing course along the sloped roof field. Counter flashing is the separate piece that covers the top exposed edge of the step flashing vertical legs against the wall. They overlap but stay independent so they can move with temperature changes without cracking a sealed joint.